Installing baseboards can be tricky, especially so when you have to account for carpet going on the floor. Here I’m going to give you a few hacks to make this task a bit easier.
First Thing’s First… What’s the First Thing Though?
Considering you’re searching the web for information on installing baseboard, I’m going to make a wild assumption that you are a DIY master craftsman, and you’re going to be handling all the renovations in this room yourself. If that’s the case, you’re in luck.
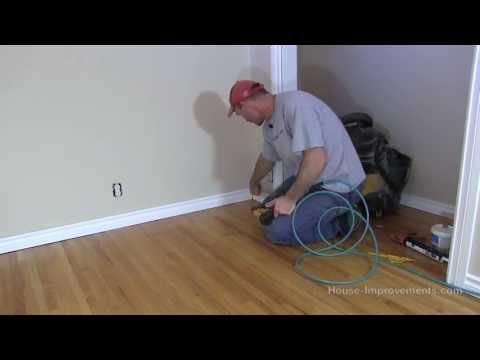
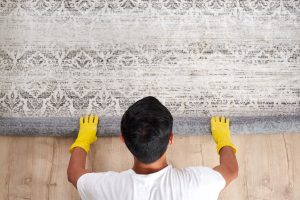
Installing the baseboard will be significantly easier if you put the carpet in first. Go on now, put the air compressor and all the base up and get out your 22oz hammer and knee pads, it’s time to start tacking.
Even if you’re not doing the carpet yourself I would recommend waiting until it is done so that you can set your baseboards right on the carpet and not have to worry about it being exactly 3/8″ (well roughly, at least, doesn’t have to be perfectly accurate) off the ground.
I CANNOT Risk Getting Paint On This Carpet
If doing the carpet first isn’t an option for whatever reason, it’s not that big of a deal… for the base installer at least. However, if you are both then you’ve got your work cut out for you this way.
I’m exaggerating a bit but I do find it much easier to do the carpet first and just cover the edges with carpet shield and be cautious of your splatter and drip while painting the base. But the other way saves you the consideration while painting, which is a nice time saver as well as money; that carpet shield isn’t cheap.
Do I Have to Measure All the Way Around This Wall?
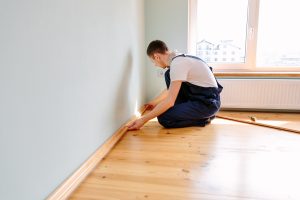
Fortunately, no, you don’t. Isn’t that a relief? Cut yourself a few 3/8″ blocks that you can use to raise the base off of the floor while you nail it to the wall. I recommend no less than 4 so that you can line up your corners and make sure they bed properly before shooting either side to the wall.
Trim Cheats
A few things to keep in mind while running your base or any trim for that matter:
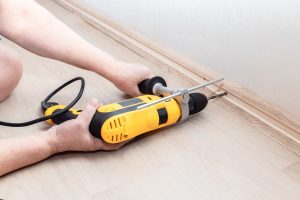
Always mark your studs on the wall before getting started as you’ll want to use the space behind the baseboard to drill your pilot holes to verify there are studs there. (I tell people this all the time and I will till the day I die: stud-finders cannot be trusted).
Make sure your nails are the optimal length, too often I have to rip out base trim that someone used 3inch nails on and I’m cursing them the entire time. 5/8″ trim + 5/8 drywall = 1 1/4″, 1 3/4″-2 1/4″ is more than sufficient for this task that puts our nails 1/2″-1″ into our studs, and considering this sits right on the floor you only need to hit 3 or 4 studs in a 16′ foot run since you have the plate along the bottom all the way around. (Or at least you should)
Be conscious of the number of holes you make. You’re going to have to caulk or putty these in before painting, and this should go without saying, but be sure you are using a “finish nailer.” 18 gauge is my preference but a 16 would also suffice.
For added benefit, here are all the tools you’ll need to pin up all your trim, if it’s step-by-step directions you seek though, you’re going to have to check another source:
18 gauge finish nailer
air compressor and hose (only if applicable to your nailer, I’ve made the switch to battery-powered air tools so my compressor is a relic now)
nails
your 3/8” blocks (if applicable)
white paintable acrylic.
I use acrylic because silicone base caulk doesn’t cover as well with paint. It tends to leave a glossy finish on your trim which can really catch your eye in the right lighting. You will likely also need a nail set and hammer in case of any ricochet or dud nails that stick out. A pair of needle nose pliers couldn’t hurt either.
Oh, One Other Thing
We established 3/8″ is the standard elevation for our baseboard which is fairly universal. Just be sure to confirm that your carpet is not subject to any special circumstance such as exceptionally thick carpet or carpet tack. The basis for the 3/8″ is standard is that carpet tack is typically just shy of 1/4″ and carpet usually ranges from 1/4″-3/8″. Therefore, the carpet stacked on top of the tack strip will cover the 3/8″ gap so that the base appears to be sitting directly on top of the carpet.
I hope this article contained the information you hoped to find and much more. Trim carpentry is one of the last frontiers of true craftsmanship and even that has lost a lot of its value. Trim used to be shaped by hand from the finest lumber by expert woodworking artisans. Nowadays, it’s usually a piece of MDF or pine ran through a machine, and out the other end pops this beautiful piece of molding that is on a million different walls all over the world.
Trim has become a commodity rather than a marvel, you would be hard-pressed a few hundred years ago to find a house with every inconsistency trimmed out. These days it’s harder to find one that isn’t. It’s truly amazing the way the lavish, newest technologies of the present become the necessities of the future.
What is going to be the next jump in decor expectation and how will people be installing their baseboards 200 years from now? Who knows? But then we don’t have to worry about that since we’ll be dead. Good luck on today’s baseboard task!