Whatever the reason may be, somewhere down the line someone might have started to lag on their standard of quality in your home or place of interest and now it falls on you to fix it up. Let this article be your guide to doing just that. I am a millwork contractor with 5+ years of experience running trim and I’m here today to share some pro tips on fixing up these little oversights.
Gather Your Tools

Before we get started go ahead and assemble these tools and materials to save yourself a multitude of trips to the shop or hardware store in the midst of completing this repair. This should be a relatively simple task so the tool list is short and goes as follows:
Razor Blade
Paintable Wood Putty (White Preferably)
Putty Knife (optional)
Rag/Fine Sanding Block (optional)
Hammer (potentially)
Small Wood Block (potentially)
It should be noted that the following method for repairing bad crown molding joints only applies to paint-grade trim, if your project requires stain-grade trim there is no easy, effective solution. You may need to purchase new trim or you could use stainable wood putty with a similar base as your material but the grain won’t show so the blemish will remain relatively obvious.
Just How Bad Is It

The first step in our repair process is determining what the damage is. If you’re dealing with a discrepancy in the angles, meaning one side of the joint is cut at a different angle than its adjoining angle, then you may just have to determine which side is not cut at its true angle, pull it off, and apply a new piece of trim. Hopefully, that is not the case for you as this can be the most costly repair for a bad joint in both money and time.
Another issue you could be facing if your angles aren’t lining up is that the two pieces of trim just weren’t “bedded” correctly. What this means is that if you’re working with say 3″ crown and it’s kicked in at the top and out at the bottom or vice versa the crown just wasn’t set at 3″ exactly while the other side was causing the miter to not align properly. If this is the problem you can likely just take a small wood block, either under the bottom of the crown or at the front on the ceiling, and hit the block with your hammer until the miter aligns.
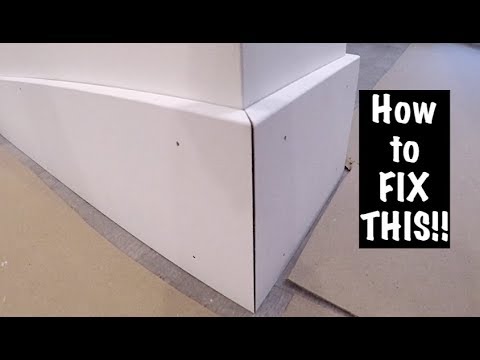
If your issue is an opening in your corner, as long as the gap is less than a 1/4″, follow the procedures below to remedy the obvious excess of caulk. If the gap is exceeding a 1/4″, the only way to truly make it look pristine is to remove the short piece causing the gap. This will be the side that’s furthest from the corner and cut a new piece the correct length and install it in place of the short piece you removed.
Open Miters
If the nuance in your crown joint is a classic open miter, this often occurs because most walls are not framed exactly “square,” and most trim carpenters will just cut a 90-degree angle rather than figure the exact angle. As the saying goes, “a little caulk and a little paint make me the carpenter I ain’t”. The issue with caulking your gaps though is that caulk shrinks and will usually have a glossy finish even after being painted which makes the gap stick out like a sore thumb. So if this is the case and your trim has already all been caulked and painted start by using your razor blade to cut the caulk out. Of course, you’ll want to be very careful not to scratch or damage the trim.
Now Let’s Make It Pretty
Now that your miter has been reopened fill the gap with your wood putty, you can use a small putty knife if you like but I just prefer to use my finger. I don’t mind getting a little messy when performing this task as the ornamental styles on most crown molding can make using the flat, stiff, edge of a putty knife nearly impossible.
Apply the wood putty to the miter by pushing it into the gap and rubbing it until the majority of the excess wipes off and the joint is relatively clean. Once the miter is completely closed up with wood putty let it sit for whatever time your particular putty recommends. Most putties have a dry time of about 2 hours for small cracks (<1/4″) or up to 6 hours for larger repairs. After your putty has dried, rub the dry excess on and around the miter off. You can even use a rag or sanding block lightly, for this step to make your joint as smooth and seamless as possible.
A Job Well Done
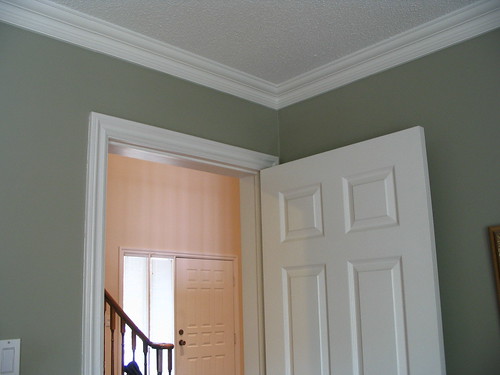
I hope that you have now successfully identified and either repaired or replaced whatever was hinder your crown molding from its full aesthetic potential. Crown molding serves no structural purpose and is entirely for decoration so it’s a shame when this kind of finish carpentry task is under-performed because it can make a beautifully finished wall look pitiful when there are crown joints and seams filled with glossy, 1/4″ globs of caulk.
It is paramount that finish carpenters such as those who run trim hold themselves to a higher standard of quality so that homeowners aren’t having to go back over their work and resolve easily avoidable mistakes such as an open miter. I hope this is the only such case you encounter through the remainder of the house and that you are now satisfied with the job that you and the other guy have now collectively completed. Good luck!