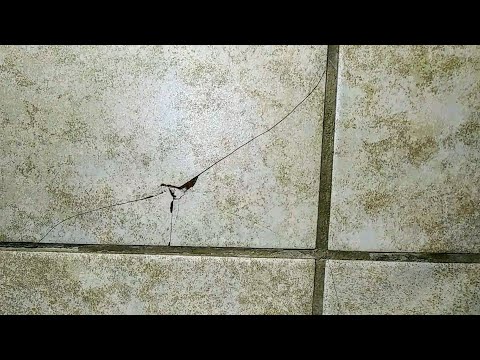
When a break in your tile is new and undamaged, the tile can easily be repaired. The tile will be harder to repair if chipping, crumbling, or multiple breaks have occurred. The option to replace a broken floor tile always exists unless you don’t have a spare tile. Then, a repair is the only option.
My ex was on the other end of the phone. “You know that big pot you used to make stews? I dropped it, and one of the floor tiles broke!” What’s a whipped man supposed to do?
Assess The Damage
There are some tiles I wouldn’t think of touching. Replacements or repairs needed on glass, granite, marble, and even a slate floor need to be assigned to professionals.
The tile my ex broke was ceramic, and it was a clean break. It was just the corner of one tile and didn’t affect any surrounding tiles. It was the perfect candidate for a repair job. Porcelain tiles are also suitable for a DIY job.
You should consider that if you choose to repair a broken tile, the reality is the break will be visible after the repair. Repair is not going to restore the floor to its original look. It is an attempt to keep the damage from getting worse.
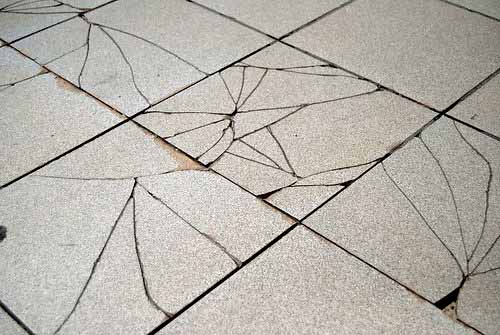
I was trying to figure out how to explain that when my ex told me there were tiles broken under the front of the washer, too. The break under the washer involved two tiles and was already beginning to crumble. It could not be repaired. The tiles needed to be replaced.
Yep. She had two birds, and I was the one stone she meant to use to get both. However, she only had two spare tiles, so the minor break would have to be repaired.
1. Repairing the Tile
You will need to collect a few tools for a repair. You will need a putty knife or 5-in-one tool. If you have one, an oscillating tool will be handy. You will need a vacuum. You will need an epoxy mix made for stone. You will need a container of pre-mixed grout. You will need a razor blade and a damp sponge.
Remove The Grout
Which portion of the broken tile is the smallest? Use a putty knife to scrape out all the grout around that section. It would be handy if you have an oscillating tool, but a putty knife or 5-in-one knife will do. With luck, the broken piece may already be loosened from the grout and the floor.
Remove The Broken Piece
Once the grout is gone, use the putty knife to pry up the broken piece from the floor gently. Try not to let the edges of the break grind together any more than necessary. Scrape away any grout that remains on the outside edges of the broken piece.
Clean The Area And Mix The Epoxy
You will need to vacuum any dust residue out of the hole in the tile. You will also need a container of epoxy that is suitable to bind stone. Mix the epoxy according to label directions and apply a liberal amount to the bottom of the broken tile. Also, apply the epoxy to the broken edge of the piece.
Set The Piece Back In Place
You want to bind the piece to the floor and glue the edge, so the break is waterproof. Use enough glue that it oozes up from the broken edges when you put the piece back in place. Wipe up any excess adhesive from the grout lines (not from the top of the break). Allow the glue to set.
Remove Excess Glue Then Regrout
When the glue is dry, you can use a razor blade to cut any excess glue from the top of the crack. Use a bit of pre-mixed grout on your finger and apply it to the grout line. Wait for about 15 minutes, then wipe the tile with a damp sponge. Wait for about 3 hours and wipe it again. It is fixed.
2. Replacing the Tile
You will need a putty knife or a 5-in-one tool. An oscillating tool will help remove the grout, but the putty knife will do the job. You will need a vacuum. You will need a tile trowel. You will need pre-mixed mortar and grout. You will need a damp sponge.
Remove The Broken Tile
Replacing the broken tile is not much more work than repairing a broken tile. You will need to remove the grout from around the entire tile. Using your putty knife, carefully pry up the broken pieces.
Clean The Area
The next step is to scrape the old mortar from the exposed floor. Make sure you do a pretty good job. Vacuum up any residue created by this process.
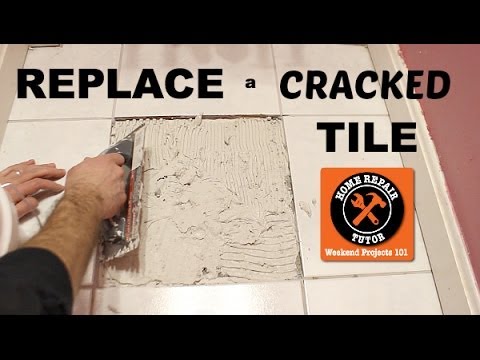
Install The New Tile
Take your new tile and set it in place to ensure no leftover mortar spots will keep the tile from lying flush. Use a pre-mixed mortar, scoop up some on a tile trowel, and liberally apply the mortar to the bottom of the tile, making sure the trowel leaves well-defined lines.
Set the tile in place. Move it around enough so that it is centered all around. Leave the tile set in place undisturbed (no walking on it!) for at least 24 hours.
Regrout The New Tile
Use a pre-mixed grout and apply it to fill the grout lines. Wait about 15 minutes, then wipe the tile with a damp sponge to remove excess grout. Do it again after 3 hours. It would be best to give the tile about three days before you resume heavy foot traffic over it.
You might notice a bit of a difference between the old tiles and the new ones. That is natural. However, the new tiles will wear and weather and eventually blend right in with the old ones. Good luck!