I’m not going to pretend this is an easy job. It isn’t easy. I have two reactions to cracked concrete. One is a frustrated snort, and the other is an anticipated backache. I might try to ignore it, too. But it doesn’t go away, it doesn’t get better, and it will eventually trip you up.
Wreck The Existing Concrete
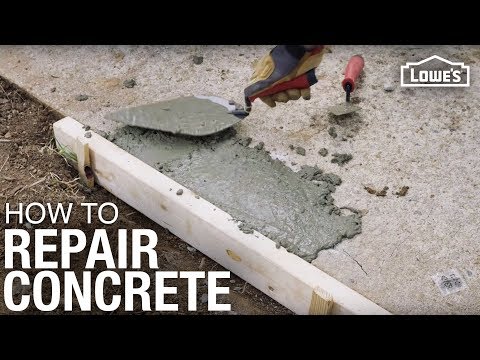
Small cracks can be repaired by filling them. Larger cracks where the concrete pushes up or falls, causing wide cracks and chunking, will need a section replaced.
Use a wet saw with a diamond masonry blade to cut through the edges of the section you are replacing. The lines across the concrete are expansion joints and a perfect spot to cut. If the area is longer than one square, you can cut it into smaller pieces. Take a sledgehammer and break large sections into pieces you can lift and gather up.
Get Down To The Source Of The Problem
Concrete cracked and pushed up is the victim of one culprit: a tree root. Concrete is porous and acts somewhat like a sponge. Tree roots love water and are drawn to it.
Concrete that has cracked and fallen in has one reason. A void in the ground has collapsed, causing the ground above to sink. Drought may cause the ground to dry and collapse into the water table. It may be due to the presence of underground water pools created by stormwater, run-off from downspouts, leaking sewer pipes, or leaking water lines.
Tree roots can be the culprit again, too. Old roots from a dead tree can decay and create voids. Likewise, old construction material left in the ground can do the same.
Eliminate The Problem If You Can
In the case of a live tree root, it’s a good idea to consult an arborist before you cut the root. If you are certain it won’t be fatal to your tree, dig down and out to each side as much as you can, cut through the root, pull it out of the ground, then hug your tree and apologize. It will understand.
It won’t be possible to find the void under the ground when that’s the problem. All you can do is fill the area. You will deal with the situation by how you put down new concrete.

Prep The Ground
Most residential sidewalks are 4 inches thick. You will want to make sure you dig down an additional 4 inches and 3-4 inches beyond each edge. The surface of the area does not need to be level. It is better if the surface is slightly higher in the middle and slopes toward the edges. That encourages drainage.
Put a 2-inch layer of ¾-1” (size 57) gravel down. Pack down the gravel. Packing forces the gravel to fit together more snugly, so shifting doesn’t occur later. You can rent a motorized compacter for a large job or purchase a hand tamper for a small job.
Mist the gravel with water and put down another equal layer of gravel. Cover that with a thin layer of silica sand. Make sure your rock and sand extend into the extra space outside the edges. Pack this layer, too. The sand will fall into and between the gravel, making a tighter base. Mist once more.
Form The Outer Edges
The concrete is contained, the corners are shaped, and edges are formed by forms. For a straight sidewalk repair, two 2 x 4s will work. First, make a 50/50 mix of vegetable oil and mineral spirits, then apply that to the 2 x 4s with a paintbrush. This will keep the wood from sticking to the hardened concrete.
You’ll need to dig out alongside the existing sidewalk a bit to place the 2 x 4s. Set the forms so the ends extend a foot or more along the side of the existing concrete, the top is level with the existing concrete, and if you are pouring a corner piece, the forms should have about a ½ inch slope to the corner for water run-off.
I secure the 2 x 4 with an 18 inch long 2 x 4 cut into a point for a stake. I drive that in the ground with a 4-lb. hand sledgehammer. I position the 2 x 4 form between the stake and the existing concrete. I secure the form to the stake with a nail. I do that to all four corners and outside the middle of each form.
Here is where your concrete can get some help resisting tree roots or sinking ground. I go to a junkyard, get a piece of old chain-link fence, and use bolt cutters to cut it to size. I lay it on the ground inside the forms. You can also pick up wire mesh at a hardware store.
Mix And Pour
A wheelbarrow will work to mix concrete for a small sidewalk job. The ratio for a concrete mix is 1:2:3:0.5. That is 1 part Portland cement, 2 parts sand, 3 parts size 57 gravel, and ½ part water. Think of each part being a bucket or shovel full.
How much do you mix? Do you remember the total amount of gravel you used for the base? If you put down 24 shovels of stone, you will need the same plus 16 shovels of sand, 8 shovels of Portland, and 4 shovels of water.
The consistency of the mix should be something like peanut butter, maybe a little thinner if you are pouring a larger area. The amount of water in the mix will determine how long the concrete is “workable,” however, too much water can reduce the strength of the concrete.
When you have it mixed, pour out just a bit more than half of the mix and spread it evenly with a cement rake. Now, put another layer of mesh or chain-link down. This creates what is known as a “mesh sandwich” and provides superior reinforcement. Directly pour out the rest of the concrete and spread it out.
Level And Finish
The first part of the finishing job is to screed the concrete. There is a tool called a screed, but I use a 2 x 4. I lay a 2 x 4 across the concrete and pull it down the length of the pour along the top of the forms with a sawing back and forth motion. A partner helps here. This smooths the concrete and levels out the top.
The hand float is used in a back and forth motion to smooth the surface of the concrete. That is called “working” the concrete and pulls up “mud,” or a watery mix of cement and sand, from the concrete. The mud is worked into a smooth surface with no lines. However, be careful not to overwork the concrete. Too much mud on top can make the surface brittle.
A tool called an edger is next. It creates a rounded edge. A back and forth motion along the forms rounds the edge. Likewise, a device called a jointer makes “joints,” or straight lines across the concrete along existing edges. The concrete will age and crack naturally along the joints.
We are almost done. Dispose of any extra concrete, wash your wheelbarrow and tools, then, after a cold drink, use a concrete broom to create traction marks across the anticipated flow of traffic. Smooth concrete can be slick, and brush strokes remove the risk of slipping.
Finishing The Job
After two days, remove the forms. That may require some tapping with a hammer to loosen them up. Fill the edges with topsoil or dirt.
The new concrete will need sealing. Several sealers are available on the market. An old-school trick is to spray the concrete with vegetable oil. It takes three applications, but it creates the same chemical reaction as a commercial sealer in the concrete.
That’s it! Your new concrete is safe to walk on, but keep foot traffic to a minimum for about a week. By the way, try to keep your pets off the new concrete for about a week. Their claws can dig in and damage the new surface. Good luck!