Subfloors are a whole different ballgame from floors. Subfloors are often rough, rustic, and made of durable materials that don’t need to account for appearance. They could be made of plywood, concrete, or any other structural material that has the ability to support hundreds of pounds per square foot.
But if the materials lose their integrity — like water damage on plywood — you’ll have to replace your subfloor by either removing a whole section or cutting a smaller section out.
Regardless of what you choose to do, you’ll most likely have to cut a replacement subfloor to size. And because potential hazards — like poor plumbing — exist in your walls, you’ll also have to cut your subfloor to be flush with the wall.
So how do you cut your subfloor to be flush with a wall? There are two answers to this. The first is based on having a straight or 90-degree angle cut. The second is based on having a curved or irregularly-shaped cut.
Both of these answers have their own challenges, and they’re the opposite of one another. 90-degree angle cuts have to be perfectly straight, while curved and irregularly-shaped cuts almost always feature some kind of taper or acute angle.
Either way, you’re cutting the subfloor to fit flush against the wall. But the methods and tools that you’ll have to use for either approach will vary, and it may take some practice before you can get your cuts correct.
How to Cut a Subfloor with a Flat or 90 Degree Angle
Cutting a floor flush with a flat or 90 degree angle is fairly simple. To complete this, you’ll need:
- A measuring tape
- A straight edge
- A sharp pencil
- A saw of some kind (as long as it cuts straight)
Here’s how you do it:
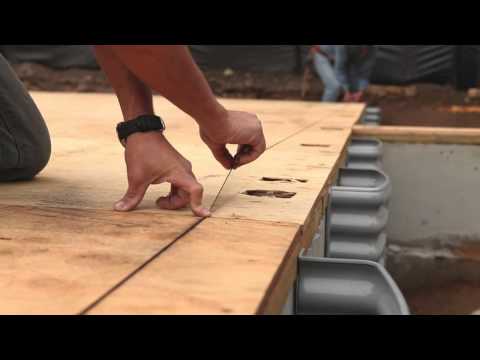
First, grab your measuring tape. Measure about where you’ll need to cut the side of your subfloor material OPPOSITE of the end you want to be flush with the wall.
Next, grab your straight edge, preferably less than 1” thick. Use this as your guide to trace a straight angle with your pencil that’s identical to the one that’s in your wall onto your subfloor material.
With both ends marked, cut your piece to size and shape.
The end result should be a simple, angled piece of subfloor that you can drop into your existing subfloor without any overlap or shape mismatch. Ideally, it’ll be cut so that it’s also flush top-to-bottom with your original subfloor as well.
After this, all you have to do is secure your replacement subfloor to the floor joists. This is a crucial part of subfloor maintenance that’s easy to overlook. After all, if you just cut a perfectly-shaped replacement piece to shore up your floor, why would you need to secure it to anything? Won’t the pressure keep the piece in place?
The answer is no. This is especially true if you have water damage or something to that effect in your subfloor. Water, humidity, and temperature variations can cause your subfloor to warp unpredictably. If it warps too harshly and too quickly, it can wedge itself free of its place and cause issues with your top floor.
This is why you need at least a few all-purpose screws that you can use to secure the new subfloor to the floor joists. The joists are integral to the structure of your home, which means they won’t warp, shift, or snap because of ambient changes. Because of this, floor joists are the essential attachment point for your subfloor — even if you’re only replacing a small piece.
How to Cut a Subfloor with a Curve or Irregular Shape
Despite how complicated it may sound to get a subfloor to line up perfectly with a curved wall, it’s surprisingly simple with the right tools.
Here’s what you’ll need:
- A measuring tape
- A scribing compass
- A sharp pencil (not a carpenter pencil)
- A coping saw
Here’s how it works:
To start, grab your scribing compass. One end of it should be pointed, and the other end will have a space to hold your pencil. Slide the pencil into place, place the pencil on top of your new material, and place the pointed side against the wall.
Next, trace the scribing compass against your subfloor material for the length that you need to cut. In this situation, the pointed arm of the scribing compass acts as a guide that lets your pencil draw every bump, curve, and angle that’s included in the wall. This then gives you the perfect outline of the shape you’ll need to cut in order to have your subfloor flush with the wall.
Then, measure where you need to cut your new material from the OPPOSITE end of the side you want to be flush with the wall. This will allow the piece to fit nicely up against the existing subfloor while pressuring the irregularly shaped side into the wall itself. Cut the excess from the back of the material.
Now, grab your coping saw. You need a coping saw because the line you traced is most likely not straight or evenly curved. There are probably bumps, ridges, and surprises that you may not have even seen before scribing. A coping saw will allow you to adjust the angle of your sawblade so that you can pivot mid-cut, allowing you to accommodate the ridges and angles in your trace.
Finally, cut the irregular shape you need from the wall-facing portion of your subfloor material. Once it’s cut, you should have a perfectly-sized subfloor piece that fits in your existing subfloor like a missing puzzle piece. Use as many all-purpose screws as you need to secure the new subfloor to your joists, and you’re ready to lay your floor on top.
Good luck!