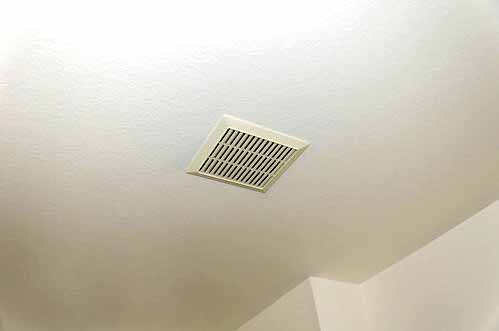
Why Do I Need A Bathroom Vent?
Let’s look at the funny answer first. It’s a Saturday morning. Your significant other gets up and walks to the bathroom. When they return, a noxious odor follows and chases you to the kitchen for coffee – and fresh air. That’s one reason your bathroom needs a ceiling vent.
The serious reason is the high humidity in the air whenever hot water is used. Without a fan to draw out the humid air, it hangs around, condensing on mirrors, ceilings, and walls. The moisture drifts out into your home just like odors do. It seeps into every crack and crevice, soaking into the wood and causing it to swell and rot. Paint bubbles up, and then it peels off the wall. In some cases, mold spawns in the moisture and grows in an ever-widening area.
How Do I Put in a Bathroom Vent?
Determine the Size of the Fan You Need
Ceiling vents are rated according to how many cubic feet of air per minute (CFM) they displace or pull out of the room. A bathroom needs a CFM rated equal to or greater than its size in square feet. For example, a 12 x 14-foot bathroom would need a vent rated at 168 CFM or higher.
Replacing an Old Vent
This is a straightforward task. It’s usually easy as “out with the old and in with the new.” It can be somewhat tedious in a downstairs bathroom where the vent sets between floors. It also can be complicated by the absence of ductwork venting the fan to the outside.
Installing a New Vent
Installation instructions will come with the fan. It involves placing the fan in the center of the room, cutting the right-sized hole in the ceiling, anchoring a support to joists, and popping in the fan after it’s all wired up.
I don’t need to tell you anything if you know how to run a new electric line to your fan according to code. If you don’t know, all I can say is you need to hire an electrician.
Venting To an Outside Wall
Some people get to this part and think the job is done. The fan is in the ceiling. The bathroom is vented, right? It is, but your ceiling vent fan will direct the air and moisture it draws out of your bathroom in the direction it points. Wood, drywall, insulation, and mouse nests in the way will get wet and either rot or grow mold. What you tried to prevent in the bathroom will occur in the crawl space or attic.
You’ll also anger the mice, and mad mice are vicious. Please don’t risk it.
Let’s Install Ductwork
You have three choices for where your ductwork will expel the vented air. 1. The roof, 2. The side of the house, and 3. The soffit. Today, we will only consider the roof vent. I prefer to vent through the roof unless the roof’s pitch is 8/12 or greater. I’ll consider the other options only when I can’t safely walk on the roof because of the pitch.
You’ll need the following materials:
• 4-inch flexible insulated duct *
• One 4-inch 90° elbow *
• Foil duct tape
• 4-inch gooseneck roof vent *
• Hammer
• Putty knife
• One 3-inch wood screw
• Roofing nails
• Roof sealant
• Tape measure
• Tin Snips
• Carpenter’s square
• Box knife
• 4¼-inch hole saw *
• Drill Gun
• Chalk
• Plumb bob
Some ceiling fans will have a 3-inch vent. Use a 3-inch elbow, a 3-inch duct, a 3-inch gooseneck vent, and a 3¼-inch hole saw.
Let’s Get Started
We begin in the attic after the fan is installed. The ceiling vent will have a fan outlet on one side. Put the elbow onto the outlet with the elbow pointing up. Position the plumb bob with the string on the underside of the roof and centered in the elbow. Mark the point where the string touches the roof. If the mark is closer than 3-inches from a roof joist, move the mark over. You want the vent away from the joist. This isn’t rocket science, so a couple of inches one way or another doesn’t matter. Drive the 3” screw through the roof at a 90° angle with the roof’s slope at that point.
Up on the Roof
I recommend using roof jacks, a safety harness, and a safety line while up on the roof. It makes the lawyers happy.
Find the screw driven through the roof. The roof vent will have horizontal flashing and square sides. Measure the size of the square sides. Draw a square box on the shingles to match with the screw as the center using chalk and the carpenter’s square. Use a box knife to cut out the square from the shingles and tar paper. Use the carpenter’s square as a straightedge to help ensure your cuts are smooth and straight. Remove the cut-out section. Assemble the cordless drill gun and hole saw. Use the screw as the center and cut out your hole through the roof decking.
Loosen the shingles from the decking around the working area with a putty knife, removing any nails in the way so you can slide the flashing at the top and two sides of the vent under the shingles. The bottom edge will remain exposed.
Gently lift the shingles and tack down the top corners of the flashing to the deck with roofing nails. Nail the bottom corners on top of and through the shingles. Put a small dot of sealant on the top of each nailhead. Replace any nails that were removed from the shingles.
Put a bead of sealant between the shingles across the original sealant line. Run a bead of sealant around the top and two sides of the vent and the exposed edges of the flashing at the bottom. Use a liberal amount of sealant to ensure all the gaps between the vent and the shingles are filled and sealed watertight. However, don’t go crazy. The sealant will run down the roof and stain it if you use too much.
Final Steps
Go back into the attic. All that remains for you to do is to attach the ends of your flex duct to the roof vent and the elbow on the ceiling fan vent. Use the aluminum tape to attach and seal the duct to the vents. Now, you can shower and wash off the sweat from all your hard work in a fog-free bathroom.
When the sealant dries, you can use a can of spray paint to make the color of all of your roof vents match, if desired. Good luck!